
Very soft and tender cake bathed with the delicate flavour of coconut is an eggless coconut cake. It’s a delight for coconut lovers. It’s a very simple recipe. It looks beautiful without any frosting too. It’s white from within and has a lovely brown crust. Do try the recipe for eggless coconut cake as it is an eggless recipe for a delectable coconut cake.
This is an eggless cake and uses yogurt and baking soda as an egg substitute. Yogurt is my favorite substitute for eggs It gives a wonderful texture to the cake. The recipe calls for fresh coconut. I had desiccated coconut. So I used desiccated coconut because I was too desperate to try this recipe and no coconut can ever be wrong. I dressed the cake using condensed milk and desiccated coconut. However, the cake was already divine. Glaze, frosting or dressing is totally optional. Whatever frosting you decide just keep in mind the cake is very soft.
Other coconut based cakes and cookies on the blog are eggless coconut cookies, which are so soft yet crumbly and a very interesting and healthy coconut semolina cake.
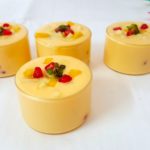
It can be served as a dessert or can be prepared for a birthday boy or girl who loves coconut.
1. Preheat the oven to 180⁰C and prepare the baking pan. I used a 7 inches pan for baking.
2. In a bowl, mix 1 ¼ cup flour, 1 tsp baking powder and ½ tsp baking soda.
3. In another bowl take ½ cup butter. Add ¾ cup sugar (powdered after measuring) to it and cream the two using a wooden spoon.
4. Add ½ cup yogurt and cream butter, sugar and curd.
5. In a separate bowl, add ½ tsp vanilla extract and ½ cup milk and mix.
6. Add the flour mix to the wet mixture.
7. Add milk and vanilla mix too. Do the additions in batches and DO NOT OVER MIX.
8. Add ¾ cup of coconut. Fold it in gently.
9. Pour the batter into the prepared pan. Level it and pat it twice.
10. Bake at 180⁰C (160⁰C in case of a fan oven or convection oven) for 40-45 minutes or till the cake is done. Once it is baked, take it out, cool, de-mold, cool completely.
11. Garnish with coconut and serve or eat.
12. Bon appetit
PREP TIME 15 minutes
COOK TIME 35-40 minutes
TOTAL TIME 50-55 minutes
1. Preheat the oven to 180⁰C and prepare the baking pan. I used a 7 inches pan for baking.
2. In a bowl, mix 1 ¼ cup flour, 1 tsp baking powder and ½ tsp baking soda.
3. In another bowl take ½ cup butter. Add ¾ cup sugar (powdered after measuring) to it and cream the two using a wooden spoon.
4. Add ½ cup curd and cream the butter, sugar and curd.
5. In a separate bowl, add ½ tsp vanilla extract and ½ cup milk and mix.
6. Add the flour mix to the wet mixture.
7. Add milk and vanilla mix too. Do the additions in batches and DO NOT OVERMIX.
8. Add ¾ cup of coconut. Fold it in gently.
9. Pour the batter in the prepared pan. Level it and pat it twice.
10. Bake at 180⁰C (160⁰C in case of fan oven or convection oven) for 40-45 minutes or till the cake is done. Once it is baked, take it out, cool, de mould, cool completely and cut.
11. Garnish with coconut and serve or eat.

Please rate us and share your valuable feedback


what is curd? I just think of lemon curd and I’m pretty sure that’s not what the recipe is calling for. thanks! Love coconut cake, so I’m hoping I get a reply.
Hi…
Curd here means yogurt. Hope this helps :).
Visitor Rating: 5 Stars
thanx