Medu Vada Recipe

Instant Medu Vada Recipe| How to Make Medu Vada

What is Instant Medu Vada?

Instant Medu Vada is a deep-fried snack made using semolina (sooji) as the main ingredient. The beauty of the dish lies in its texture; it is soft and fluffy from inside and has a real crisp outside. It is flavoured with some fresh ingredients such as ginger, coriander etc. These vada have a very interesting and beautiful shape as that of Doughnuts and a special technique is used to get that shape. In the recipe part how to make instant medu vada has been explained.

Let’s talk about the ingredients required for Instant Medu Vada Recipe

Instant Medu Vada Recipe calls for perfect medu vada batter which is made using semolina. Here I am using the regular thick semolina; you may also use the fine quality of semolina to make Instant Medu Vadas. Apart from that yogurt is required. The consistency of medu vada batter is critical and should be correct. Since these are the instant vadas, a little of quantity of baking soda is also required. For the flavouring ginger and coriander have been used. These vadas are given a very different and unique shape as that of doughnuts; it makes them really crispy because centre as well as the circumference gets crisp.

Other vada recipe on the blog are sabudana vada, instant bread vada etc.

How To Make Instant Medu Vada

1. In a mixing bowl add one cup of semolina (sooji). Into this add 3/4 cup yogurt (dahi), 1 tsp finely chopped ginger and 1 finely chopped green chilli. Also add in salt to taste.

Medu Vada Recipe

2. Mix everything.

Medu Vada Recipe

3. Add 1 to 2 tbsp of water.

Medu Vada Recipe

4. Let the batter rest for some 15 to 20 minutes.

Medu Vada Recipe

5. Meanwhile lets prepare to shape the vadas. Take a clean and smooth muslin cloth and a big bowl.

Medu Vada Recipe

6. Spread and tightly hold that cloth on the bowl.

Medu Vada Recipe

7. Secure it with an elastic band.

Medu Vada Recipe

8. When batter has rested for 15 minutes, add handful of chopped coriander.

Medu Vada Recipe

9. Also add in a little less than 1/4 tsp of baking soda. Mix it well.

Medu Vada Recipe

10. In order to shape the vadas, dip your fingers in a bowl of water.

Medu Vada Recipe

11. Take a portion of batter.

Medu Vada Recipe

12. Put it on the cloth.

Medu Vada Recipe

13. Make a hole in the centre.

Medu Vada Recipe

14. Carefully flip the vada back on your fingers.

Medu Vada Recipe

15. Heat enough oil. Add vada into it and deep fry on a medium flame.

Medu Vada Recipe

16. Fry till vada turns golden brown.

Medu Vada Recipe

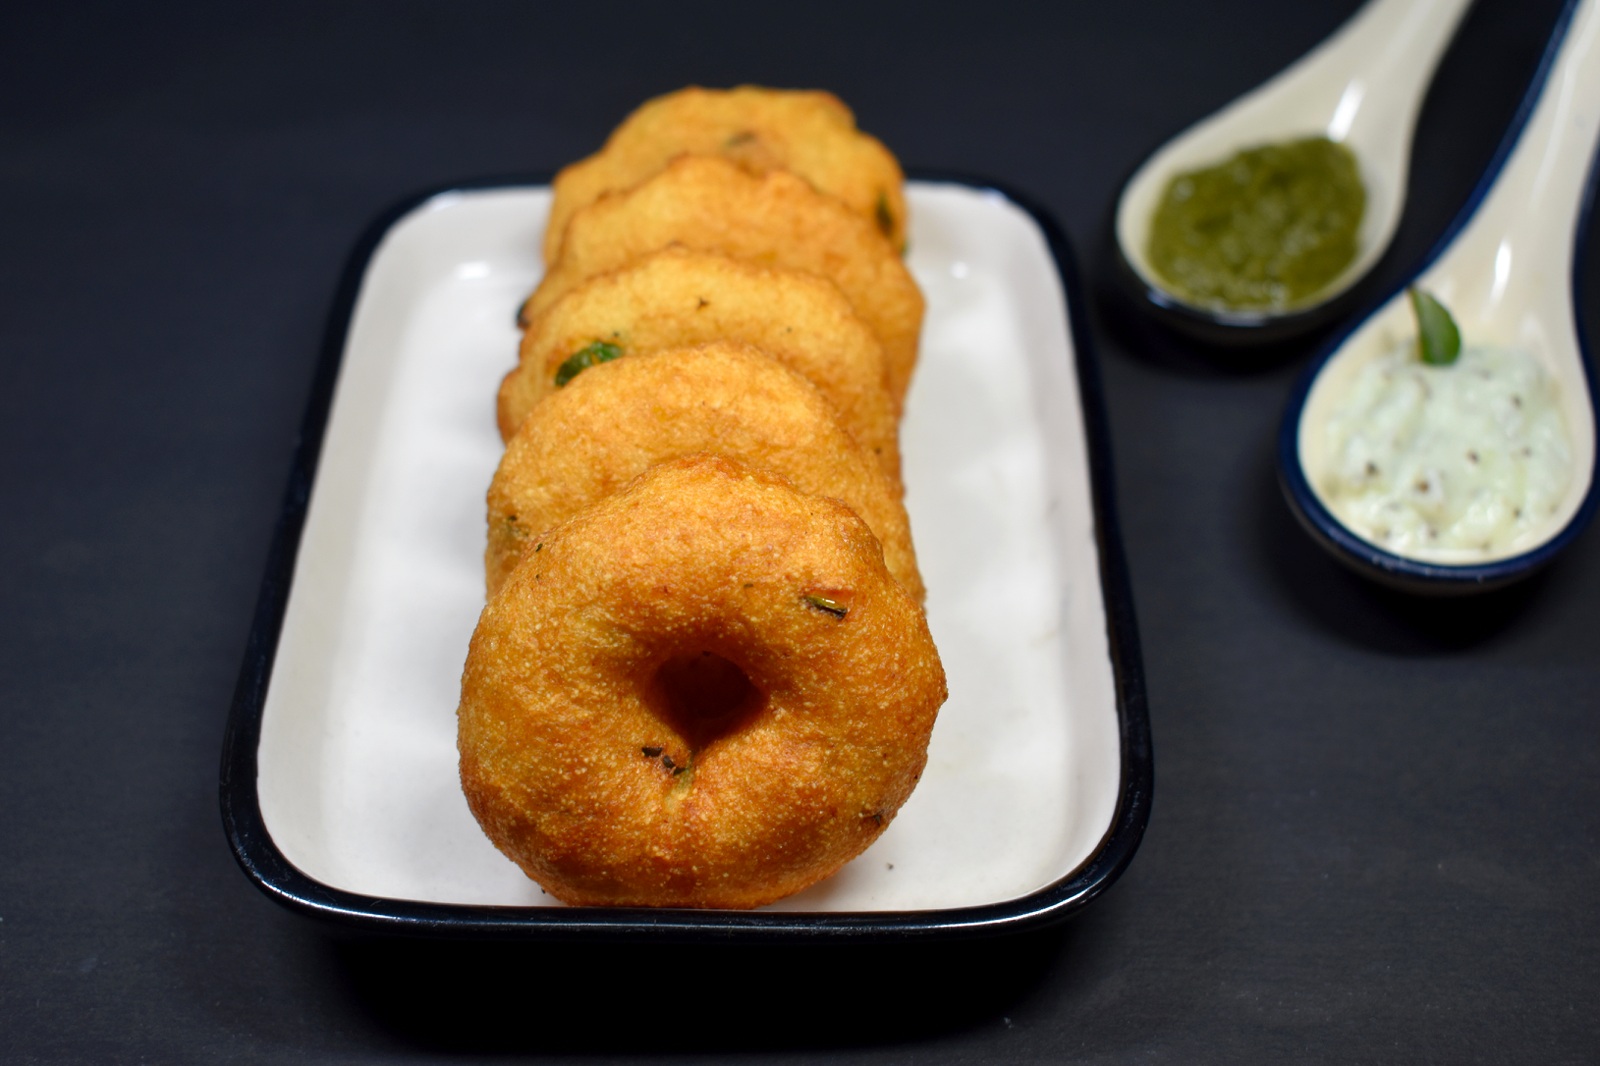
17. Serve hot with coconut chutney. Bon appétit.

Medu Vada Recipe

Tried this recipe?

Please rate us and share your valuable feedback

Let’s Connect

Recipe Videos

[sbvcytc template="7" layout="fitrows" results_per_page="5" no_of_columns_desktop="1" no_of_columns_tablet="1" grid_thumbnail_size="default" title_font_size="15" title_font_weight="700" enable_description="" enable_hd_tag="" enable_video_length="" enable_video_views="" enable_video_likes="" enable_video_post_time="" enable_social_sharing="" pagination_type="disabled" preview_related="" enable_carousel="" channel_id="UCY9O2iE3fv9vZkacrmre99w" api_key="AIzaSyAXCSUG20XxTmVFUTI3rreWcikoNUel0qg" custom_wrapper_class="videos_page side_bar_video"]

Latest Recipes

About the Author

Author’s Name

Vini

Hi! I am CA Vini Mehta. A Chartered Accountant by profession, a food blogger by passion! First of all, I would like to thank you for stopping by at Viniscookbook, I hope you have a good time. Here, yo...u will find the recipes which have been tried, at times re-tried in my kitchen and relished on the dining table. I am mother of two kids and the wife of a person with a high and selective taste sense, so basically anything, before finding its place on the blog, has many levels to cross and clear. This journey started a couple of years back. Before that I was making the most usual kind of food. The only experiment used to be asking my mother how to make something new or different☺. Then, one day, I tried a recipe for butter cookies. And they did not get to go in the container as they were over before I could store them. That day I was introduced to the joy of experimenting with recipes. And I loved everything else that followed especially garnishing and photographing food. I am still not well versed with the photography dos and don’ts but I love to experiment and learn, be it photography or cooking. Hope you too enjoy this journey as much as I do☺! Stay healthy, stay tuned!.

Trending Recipes

"); newWindow.document.getElementsByTagName("head")[0].appendChild(style); newWindow.document.getElementsByTagName("head")[0].appendChild(style1); newWindow.document.close(); jQuery('.printBlock').show(); } jQuery('.print_btn').on('click',function(){ printData(); })jQuery(document).ready(function () { jQuery("#reletedpostslide").owlCarousel({ margin: 9, nav: true, navText: ["
", "
"], loop: false, navigation: true, touchDrag: true, mouseDrag: false, responsive: { 0: { items: 1 }, 380: { items: 1 }, 480: { items: 1 }, 768: { items: 3 }, 992: { items: 4 } } }) });