
Makhani is a word derived from makhan which means butter. Makhani gravy is a tomato-based gravy with a buttery and smooth texture. It has a hint of garlic and dry fenugreek leaves, and slight sweetness which balances all the flavors. Many restaurant-style dishes are prepared using makhani gravy. Makhani gravy can be used to prepare party dishes or weekend dinner recipes etc.
If we talk about basic Indian gravies, makhani gravy is one of the most popular basic Indian gravies. I have already posted palak gravy which can be used to make a number of spinach based Indian gravies. Likewise, there are few more basic Indian recipes such as white gravy, yellow gravy, etc. which will be coming soon on the blog.
Following ingredients are required to make makhani gravy
Tomatoes: Selection of correct tomatoes is very important for delectable makhani gravy. Firm and non-tangy tomatoes are required for the makhani gravy recipe. The tomatoes should be ripened ones. Further approximately a tbsp of grated beetroot is also added which adds to the color of the gravy. No onions have been used.
Ginger paste and garlic paste: Fresh paste of ginger and garlic adds much flavor to the makhani gravy.
Butter and heavy cream: If we are talking about makhani gravy these two ingredients are a must. Makhani gravy is cooked in butter and finished with cream.
Spices and sugar: Kashmiri red chili powder is very important for perfect makhani gravy, as it adds a lot to the gorgeous color without adding too much heat to the gravy. No turmeric powder is added. Little sugar helps to balance as well as enhance the flavors.
As already mentioned, the basic palak gravy recipe is on the blog. Further I shall be posting other basic Indian gravies soon.
On the blog there is butter paneer masala recipe that has been prepared using this makhani gravy. Other than paneer, mix veg or veg jhalfrezi, dal makhani too can be prepared using this makhani gravy.
1.This recipe can be used to make gravy preparation for 6-8 persons.
2.Add 4 tomatoes cut lengthwise in boiling water.
3.Add in 1 tbsp of grated beetroot.
4.Simmer the tomatoes for 10-12 minutes or till the tomatoes turn soft.
5.Take out on a plate. And let it cool down. Do not discard the water.
6.Peel off the tomatoes pieces.
7.Transfer the tomato pieces and ½ cup soaked cashews (kaju tudka) to a grinding jar.
8.Add water as much required. Use the water in which tomatoes were boiled.
9.Make smooth puree. Keep aside for now.
10.Heat 1 tbsp of oil. Add 2 tbsp of butter.
11.Next add 2 tsp each ginger and garlic paste. Cook for 1 minute on low flame.
12.Add 1tbsp of Kashmiri red chili powder. Cook on low flame for 30 seconds.
13.Add in the prepared puree.
14.Cook till the oil oozes.
15.Thereafter transfer to a plate to cool it.
16.Transfer the prepared gravy to a grinder jar. Add water as per the desired consistency. Use the water that was used to boil the tomatoes. Mix well.
17.Pass the gravy through a strainer.
18.Transfer to a cooking pan. Let it cook. Add in 2 tsp of sugar and salt to taste.
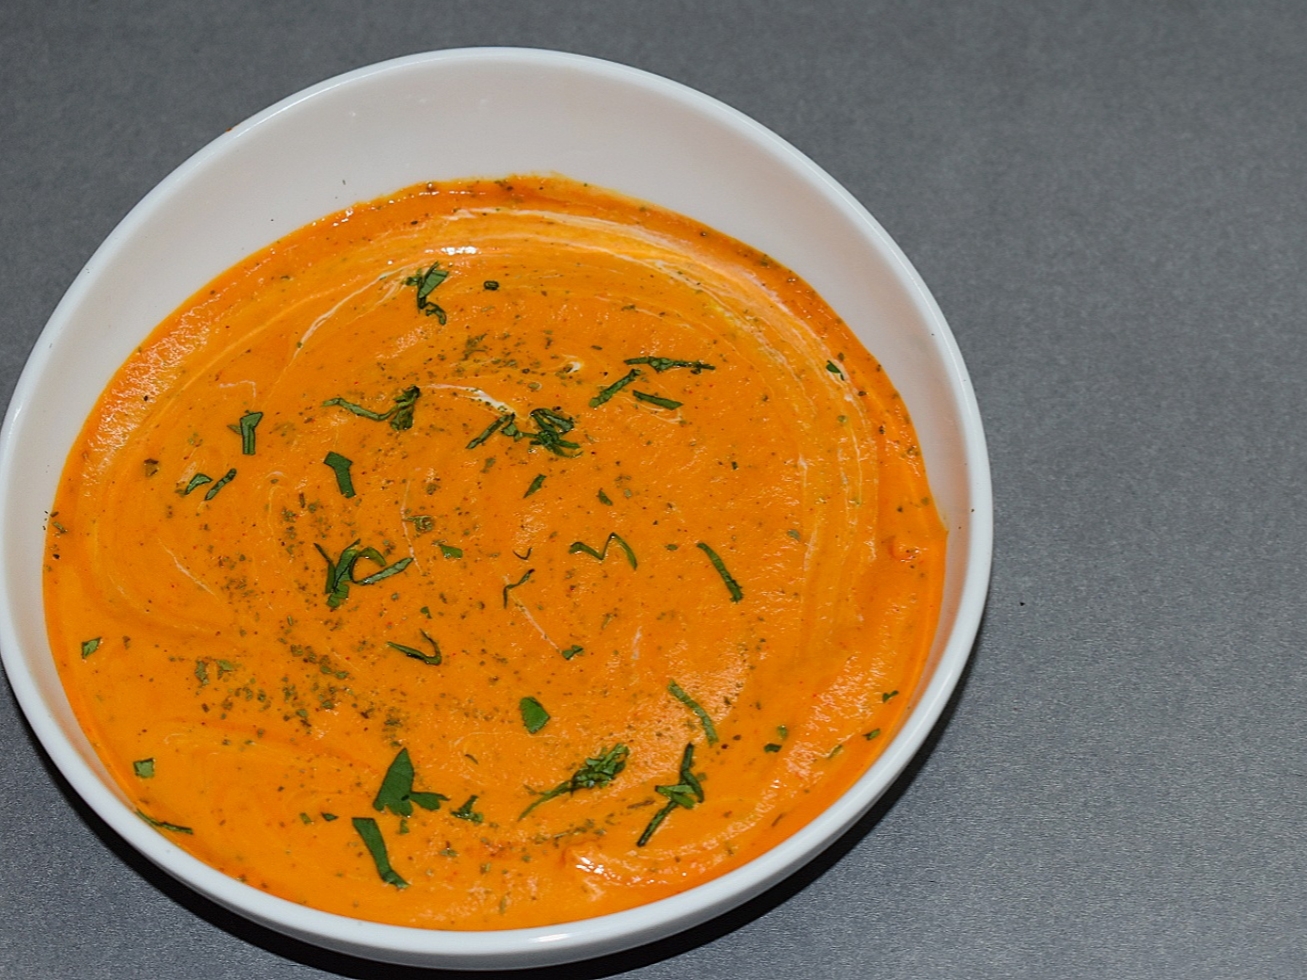
19.Finish off with ¼ cup of cream and 2 tbsp of fenugreek leaves (kasuri methi). Check and adjust the seasoning and consistency of the gravy.
20.Ready to use. Bon appetite!

PREP TIME 20 minutes
COOK TIME 20 minutes
TOTAL TIME 40 minutes


Please rate us and share your valuable feedback


Visitor Rating: 5 Stars
Fabulous preparation ..lovely colour n texture